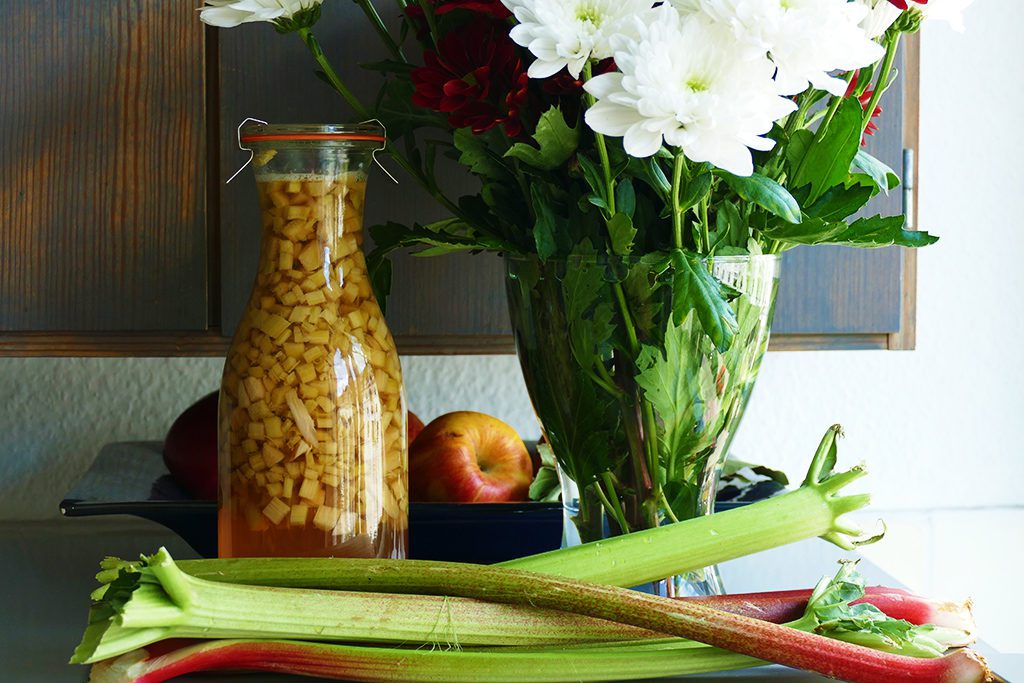
Pickled fruits and herbs from the Mediterranean cuisine are fantastic: Tasty, pretty, and with my recipes so easy to make! It’s also a great gift to your family’n’friends and a creative way to store the Mediterranean Sun in your pantry.
Especially during travel-restricted times, it’s a great way of bringing the flavors of summer into your kitchen cabinets.
The Homey Globetrotter
In general, I love preserving and bottling fruits and vegetables by using aromatic ingredients, herbs, and spices. Sometimes, I even churn my own mayonnaise. Until now, I didn’t try to churn butter, but even that day may come.
Although I’m a globetrotter, I also have a very homey side.
Hence, now that annoying travel restrictions are still restraining us from sampling local cuisine, enjoying regional delicacies, and buying edible souvenirs, I put together some of my favorite recipes, mainly inspired by the Mediterranean cuisine.
The Most Important First Step
Before preparing all those delicious condiments that I’m introducing, you need to make sure to have enough squeaky clean containers – glass jars and bottles. To store the liquids, the containers should also be sterilized.
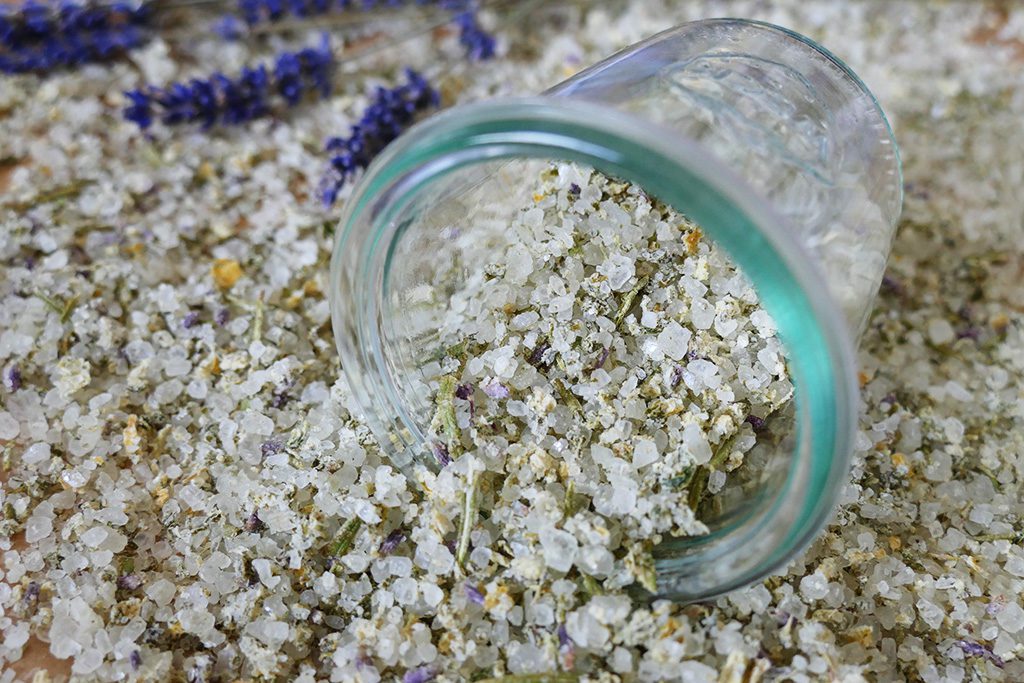
SALT
Recently, I was re-editing, updating, and completing some posts from Croatia. There, I had the pleasure of sampling some of the best olive oil and truffles, indeed.
Since I had been on a road trip, I didn’t take the chance to carry heavy bottles of oil in my luggage.
Albeit, I’m regretting it to this date.
However, before leaving the Adriatic coast, I made sure to stock up on some infused salt. One was purple from the red wine it had been soaked in, obviously. The other one contained orange peel.
Since my supply was rather scant and quickly used up, I decided to make my own.
Giving salt some zingy flavors is not only as easy as ABC. Due to the dry consistency, it also doesn’t get spoiled and is easy to store for a long period of time.
Whereby, these infused salts are so delicious, you probably won’t have to worry about storing them for that long, anyway.
Like all these homemade pickled and potted delicacies, infused salts make also a great gift.
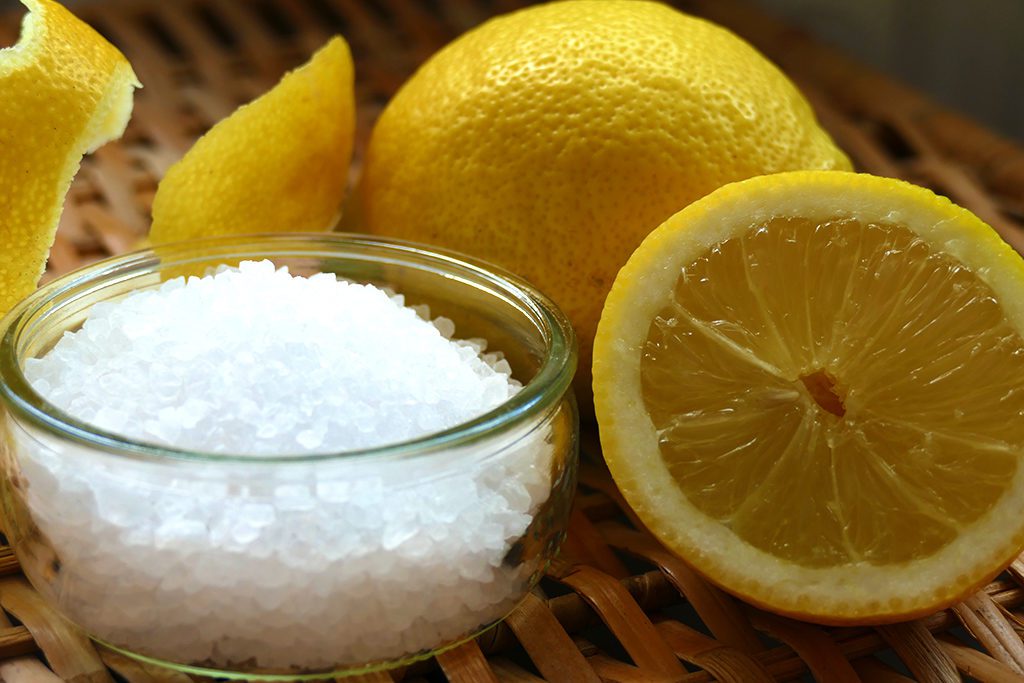
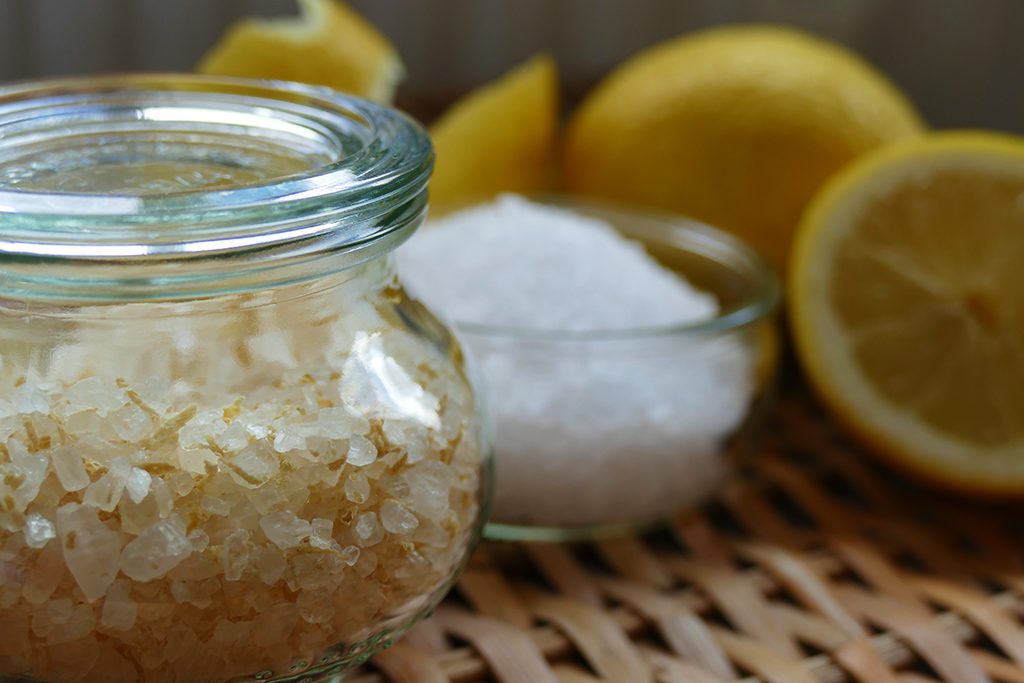
Citrus Salt
This Is What You Need…
- 150 to 200 grams of sea salt
- two lemons respectively two oranges
- spoon
- baking tray
- bakery paper
- containers – preferably clear glass
- optionally sticky labels
…And This Is How You Do It
- Preparing
Rinse the lemons or oranges under hot water and dry them with a clean kitchen towel.
Then, grate the zest thinly with a grater. However, make sure not to grate the bitter white pith that’s under the peel.
Finally, squeeze one to two tablespoons of juice from the fruits. - Mixing
In a bowl, mix the salt with the peel. Then, add the juice and stir well. - Drying
Pre-heat oven at 80 to 100° Celsius. Then, spread the salt on a baking tray – preferably covered with a sheet of bakery paper.
Finally, place the tray in the oven and let the salt mix dry for about an hour. Stir it from time to time. - Storing
Now take the salt out of the oven and let it cool.
Then, fill it in clean and dry containers. They don’t have to be sterile.
If you need your salt finely granulated, use a salt mill.
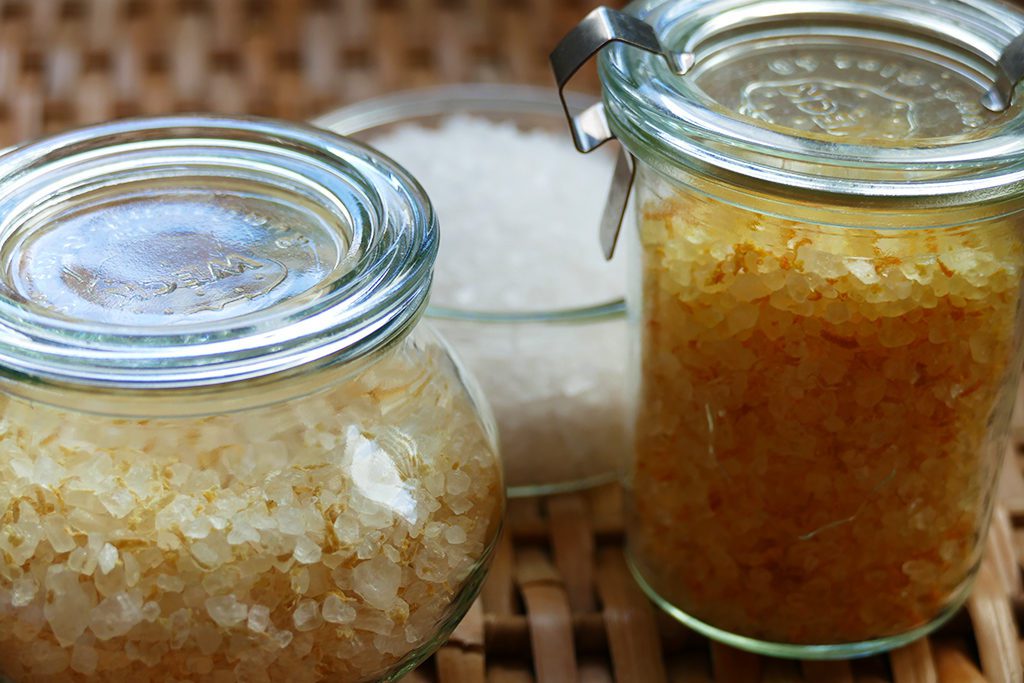
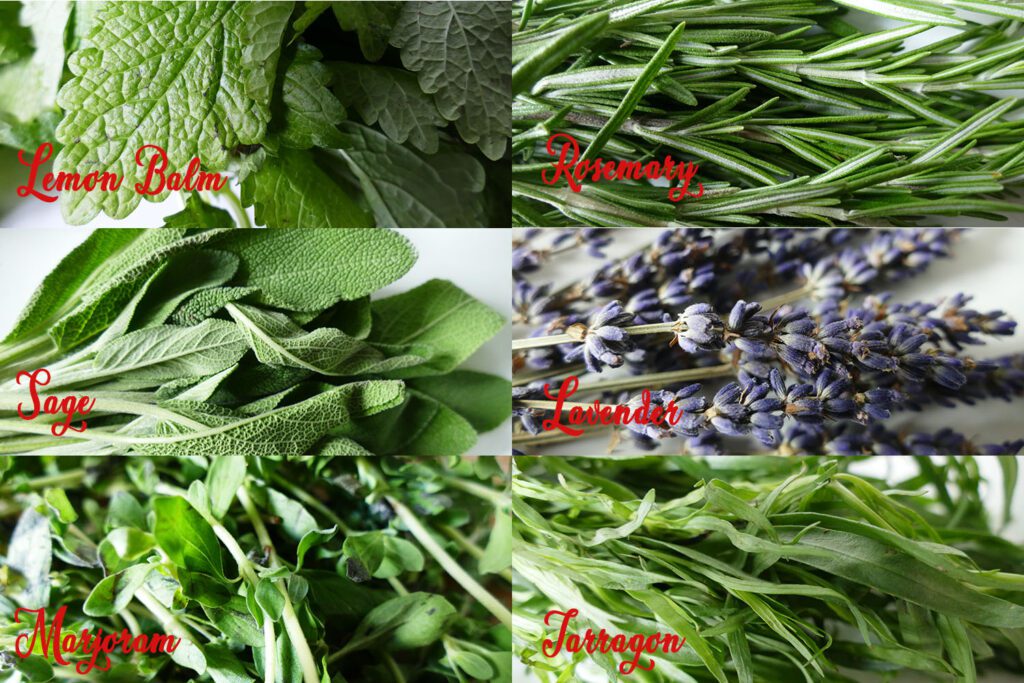
Salt With Herbes de Provence
The Provence, nonetheless, is by far not the only region where you find wide fields of beautiful lavender. In Croatia, especially in the region around the island of Korčula, but also in Dubrovnik, lavender products were big!

Hence, to get this iconic South European smell into my kitchen cabinet, I decided to preserve it in a badge of salt.
This Is What You Need…
- 150 to 200 grams of sea salt
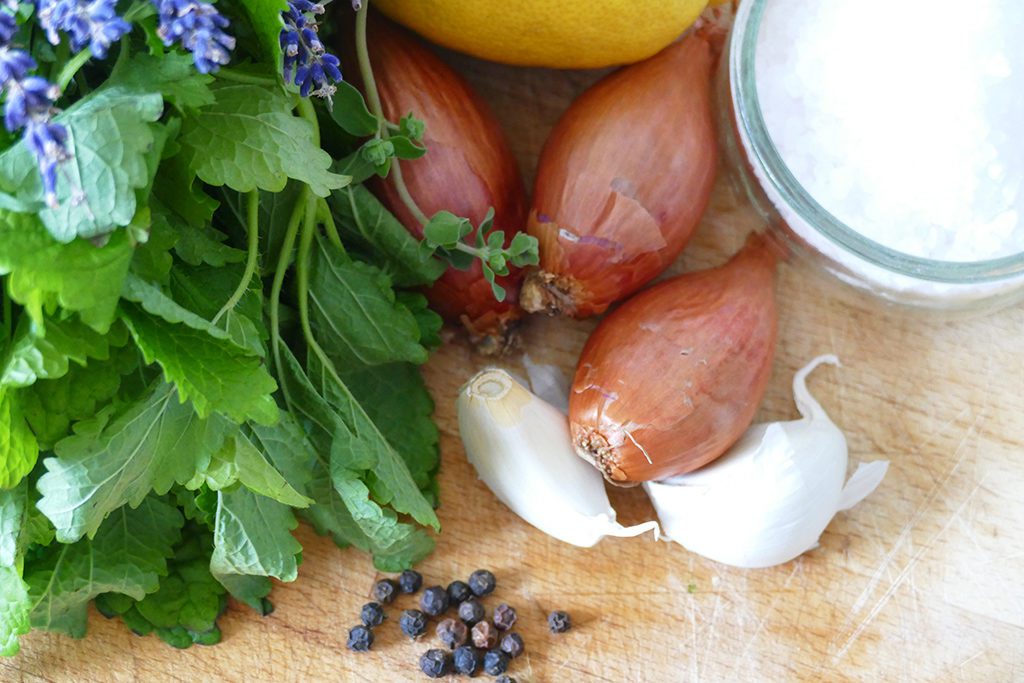
- one clove of garlic
- a piece of unsprayed, edible lemon zest
- two twigs of lavender
- five large leaves of lemon balm
- two twigs of marjoram
- one twig of rosemary
- five leaves of sage
- one twig of tarragon
- clean kitchen towel or kitchen paper
- sharp knife or hand blender
- baking tray
- bakery paper
- containers – preferably clear glass
- optionally sticky labels
…And This Is How You Do It
- Preparing
Firstly, rinse the herbs and dry them with a clean kitchen towel.
Then, peel garlic cloves and cut them in half.
Also, cut the zest in pieces. - Chopping
Chop herbs, garlic, and zest in fine pieces. It’s easier and quicker if you use a hand blender, obviously.
If necessary, add a little lemon juice or water to make mixing easier. - Mixing
In a bowl, mix the salt with the herb-mixture and stir evenly. - Drying
Then, pre-heat oven at 80 to 100° Celsius. Spread the salt on a baking tray – preferably covered with a sheet of bakery paper.
Place in the oven and let it dry for about an hour. Stir it from time to time. - Storing
Take the salt out of the oven and let it cool.
Then, fill it in clean and dry containers. They don’t have to be sterile.
If you need your salt finely granulated, use a salt mill.
Don’t Let Anything Go to Waste
So you’ve made a badge of salt and there are still so many herbs left?
Before I show you in the next chapter which other food might enjoy a little Mediterranean aroma, put three twigs of lavender aside.
Firstly, strip them of the blossoms. Then, pour sugar in a storage container and add the blossoms. Close tightly and shake well to mix. Finally, let infuse for a couple of days.
Lavender sugar has a very strong aroma. It’s great in cookies’n’cakes, but gives also sauces, salads, and even roasted veggies an unusual twist.
OIL
Oil can be a wonderful condiment – and good olive oil as such is a delicacy, obviously. However, with aromatic herbs and some zingy lemon zest, you can actually pimp it up a notch.
However, infusing oil requires the highest standard of hygiene since it’s a very sensitive and damageable ingredient.
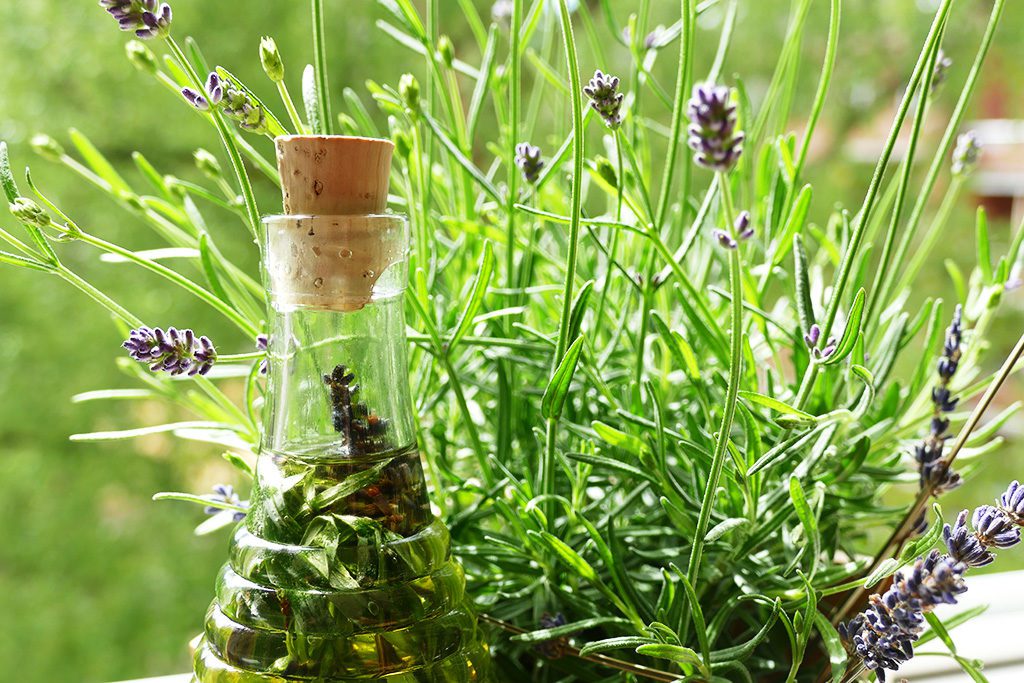
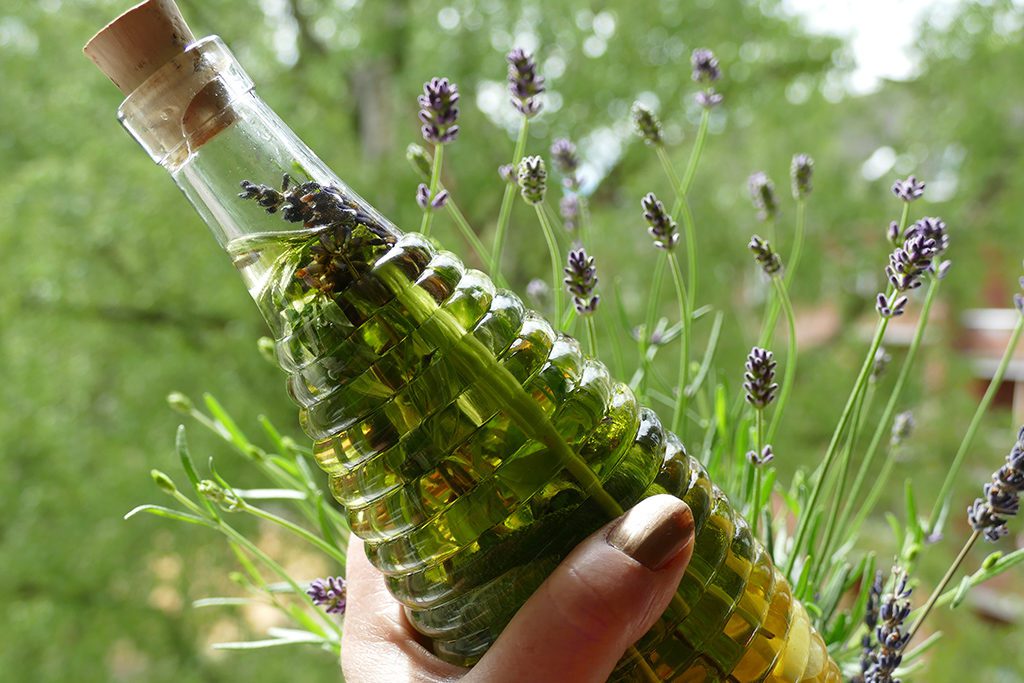
Oil With Herbes de Provence
So using clean, dry, and preferably lightproof containers is crucial. Then, all ingredients must be completely dry.
If you add also chili peppers, they have to be roasted in some oil before putting them in the bottle. Otherwise, your oil will probably go to waste.
Even if you follow all these rules of hygiene, avoid making too large badges and try to use up the infused oil as quickly as you can.
Also, removal of the spices and filtering the oil after the process of infusion extends the shelf life.
This Is What You Need…
- oil of good quality, preferably organic, for instance, olive oil and sunflower oil
- a piece of unsprayed, edible lemon zest
- two cloves of garlic
- two twigs of lavender
- two twigs of lemon balm
- two twigs of marjoram
- two twigs of rosemary
- two twigs of sage
- two twigs of tarragon
- clean kitchen towel or kitchen paper
- two large glass bottles
- funnel
- a chopstick or a pair of long, thin tweezers
- strainer
- filter cloth or paper coffee filter
- optionally sticky labels
…And This Is How You Do It
Part I
- Preparing
If you like, firstly rinse the herbs and dry them thoroughly with a clean kitchen towel. They have to be completely dry. If you’re not sure, let them air dry for at least one hour. Or dry them for about 15 minutes in the oven at 80° Celsius.
You can either grate the zest or you just cut it off in a spiral with a sharp knife. Make sure not to grate the bitter white pith that’s under the peel.
Finally, crush the garlic with the blunt side of a heavy kitchen knife. - Bottling
Place all ingredients in a large, sterile bottle. In case the bottleneck is too tight, use a clean wooden chopstick or long, thin tweezers to push the ingredients as deep as possible. Ideally, they should be below the bottleneck. - Filling
Using the funnel, carefully fill the oil in the bottle. I used about 1/3 olive oil and 2/3 sunflower oil.
Olive oil has a fantastic aroma, however, for infused oil, it can be a bit dominant. Therefore, a mix of mild oil and some aromatic olive oil is ideal.
It’s important that all ingredients remain entirely covered with oil. Parts that are not covered might get moldy.
Close thoroughly and leave for at least two weeks in a dark, cool place.
Part II
- Filtering
Once you decide to use the oil – if you are impatient or need it for a gift, you can shorten the infusing process to one week – you might want to filter the oil to extend shelf life.
If you leave the herbs in the oil, you have to use it up much faster.
If the bottleneck is very tight – like the one in the picture – you better first pour the oil through a fine filter in a container like another bottle, a jug, or even a bowl. Your filter can be a normal strainer, however, you should line it with a piece of filter cloth or paper coffee filters that you cut in shape. - Storing
Fill the filtered oil in a clean, absolutely dry bottle and close tightly.
Pull the herbs, garlic, and zest out of the bottle. This might work best when you use the tweezers.
Don’t throw these oily delicacies away – you can use them for various purposes.
Don’t Let Anything Go to Waste
Hence, you took all these herbs out of the oil. So what now? Throwing them in the trash?
No way!
They are still full of these rich oils and bursting with aromas, after all. Therefore, they are perfect for seasoning.
For instance, you can use them for oven-roasted veggies. Therefore, peel a couple of potatoes, a sweet potato, a chunk of pumpkin, carrots, one or two beetroots. Then, cut them in wedges the size of regular fries. Chop the herbs finely and combine them with the root veggies. Add some of the infused oil if needed.
Set aside for at least one hour, possibly, however, over night.
Eventually, preheat oven to 220° Celsius, place veggies in a large roasting pan, and roast for about 30 minutes.
Following this recipe, you can also roast meat like for instance diced chicken.
Another savory way to recycle your herbs is by making potted cheese. To do so, you need to cut some soft cheese like Greek feta or Italian mozzarella to not too tiny cubes. Place them in a bowl and mix them with the finely chopped herbs. If needed, add a bit of the infused oil and mix it thoroughly.
Let infuse for at least one hour, better over night.
And finally, just use your imagination which others produce or dishes might need a little zing.
VINEGAR
So you’ve prepared this wonderful oil and now all your salads have this light aroma of the Mediterranean sun. But wait, something is still missing…
Right: We still need a good vinegar. We don’t want to mess up the oily elegance with some industrially made stuff, after all.
Rhubarb Vinegar
I love rhubarb. Love it in soda, love it on pie, and love it in compotes.
Therefore, to me, infusing vinegar with rhubarb was just obvious.
This Is What You Need…
- high-quality vinegar, preferably organic
- 300 to 400 gram of rhubarb
- a tablespoon of sugar
- two large glass bottles
- funnel
- strainer
- optionally sticky labels
…And This Is How You Do It
- Cleaning
Clean and prepare the rhubarb by pulling off the strings and cutting off the tips. Then, dice in small cubes. - Bottling
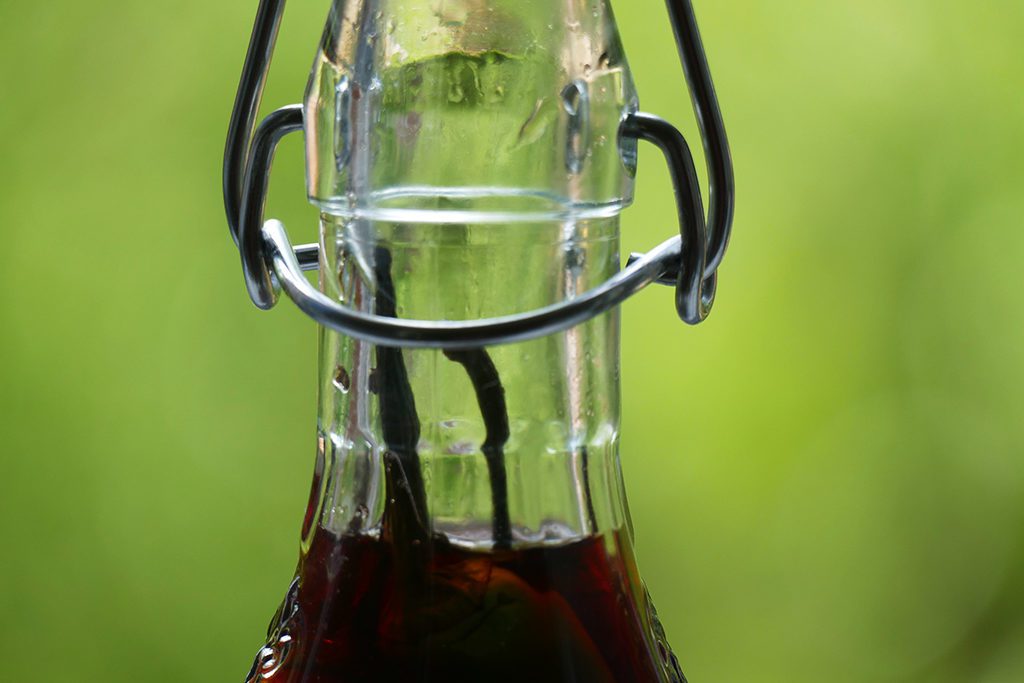
Fill the diced rhubarb in a clean, sterilized bottle and cover it with the vinegar by using a funnel in case the bottleneck is too narrow.
Keep for about two weeks or longer in a cool and dark place. - Filtering
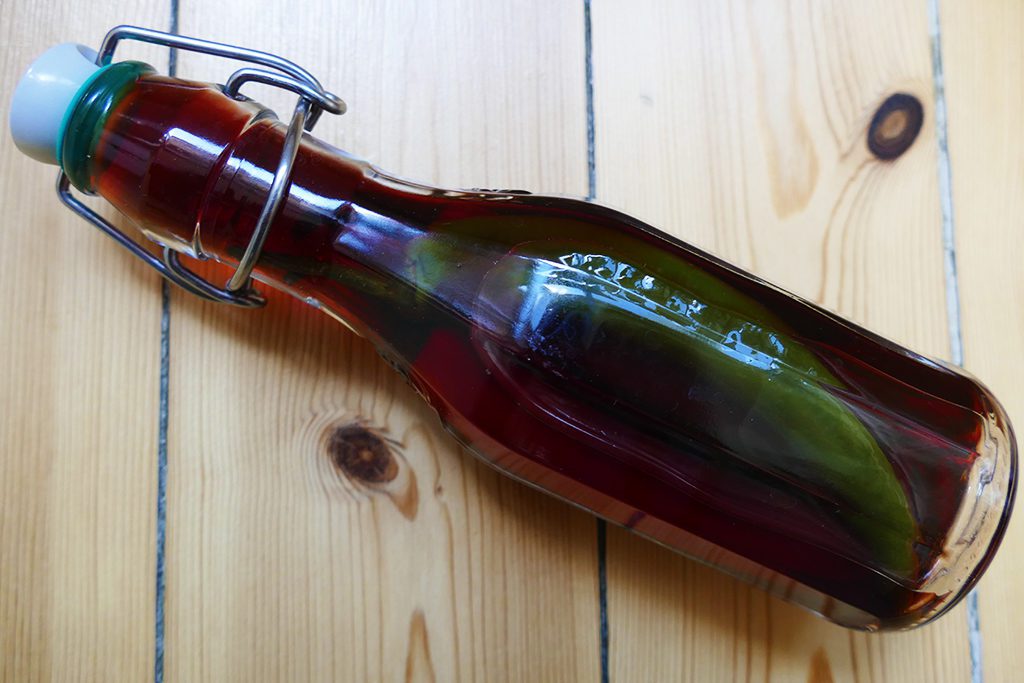
When you’re ready for your vinegar, let it percolate into a jug or bowl. Dissolve one tablespoon of sugar in the filtered vinegar. Stir well and fill in one large or several small bottles.
The diced rhubarb looks very pretty in the bottle, I give you that. You can actually keep it like this, however, it shortens shelf life significantly.
PEPPER WINE
Like to spice up your life – and food – a bit? Me too. And Pepper Wine is the ideal condiment. It’s incredibly easy to make and once you’ve tasted it, you’ll never again be able to enjoy Worcester Sauce & Co.
Pepper Wine is actually a whole different level of spice heaven.
This Is What You Need…
- high-quality rum or alternatively some excellent port wine
- three chili peppers, whereby a mix of different colors makes the appearance even more appetizing
- a glass bottle
- funnel
- a chopstick or a pair of long, thin tweezers
- optionally sticky labels
…And This Is How You Do It
- Cleaning
Since the chili peppers will be drowned in alcohol, you don’t need to be as careful as if you use them to infuse oil. However, you should wash them and let them dry. - Bottling
Carefully stuff the chili peppers into the bottle. One after another and without damaging the skin.
If the bottleneck is very tight, you can use a chopstick or long tweezers to gently push them inside. - Infusing
After you fill the bottle with the liquor, close it tightly and let it stand for at least two weeks.
After about two weeks, the pepper wine is ready to give your sauces, gravies, soups, dressings, and much more this special twist. However, use it gingerly – it can be very hot. You might want to add it teaspoon by teaspoon.
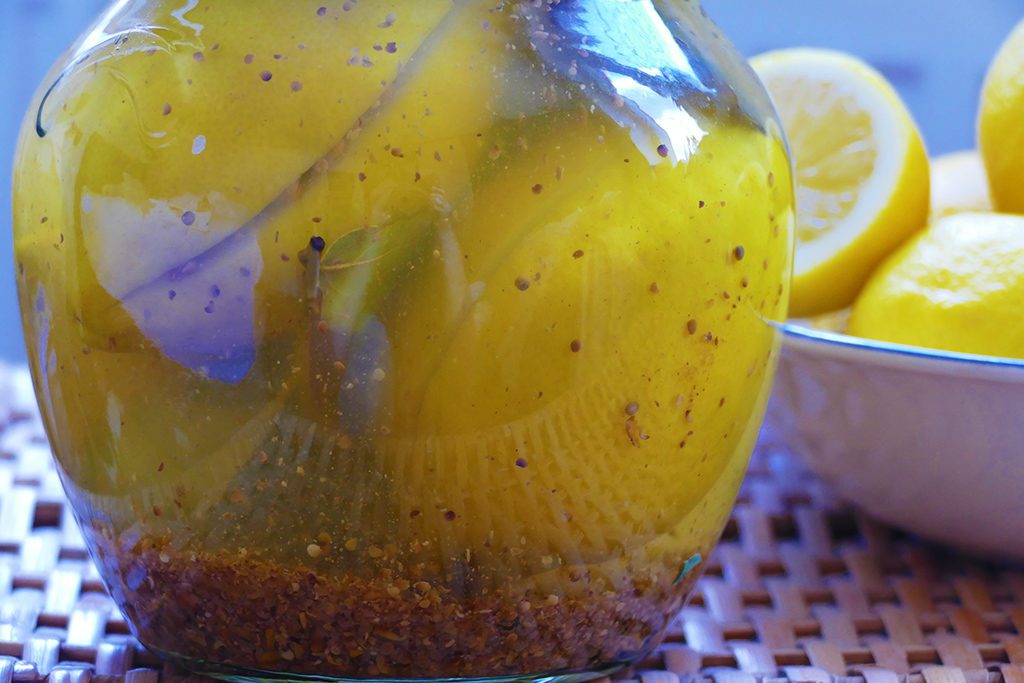
PICKLED LEMONS
The cheese in the Mediterranean countries tends to be very aromatic and even a bit spicy. No matter if it’s from cowmilk, from goats, or from sheep, there is mostly a slightly piquant bouquet to it.
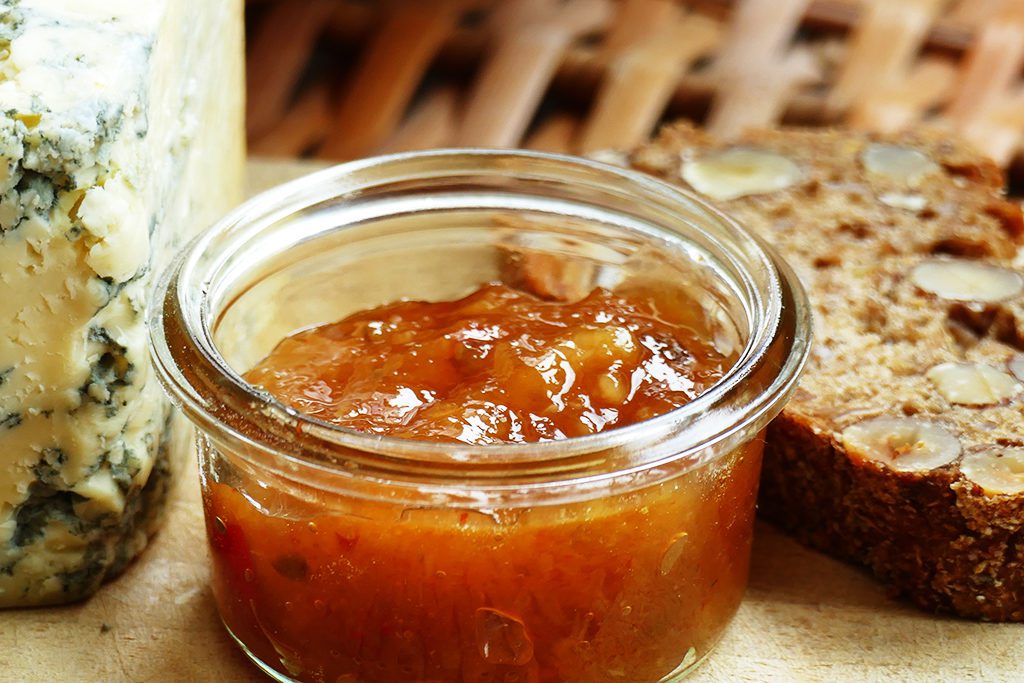
Well, this zesty and tangy taste goes perfectly well with a bitter-sweet fruity flavor of chutneys and jams.
Spicy Lemon Marmalade
While the most common accompaniment is fig mustard, I share a recipe for a fantastic spicy lemon marmalade with you. It’s sweet and, obviously, sour with a hint of chili – believe you me, although it takes a bit of preparation, this potted fruit spread makes it all worth your while!
This Is What You Need…
- 4 to 5 organic lemons with unsprayed, edible zest
- one small green bell pepper
- one red chili
- one teaspoon of salt
- 250 g sugar – or up to 400 g if you want your marmalade rather on the sweet side
- a sharp knife
- fine grater
- a hand blender
- funnel with wide neck
- jars with twist-off lids
…And This Is How You Do It
- Preparing
Rinse the lemons under hot water and dry them with a clean kitchen towel.
Grate the zest thinly with a grater. Make sure not to grate the bitter white pith that’s under the peel.
Finally, juice the lemons. - Cutting
Cut four halves of the juiced lemons in small pieces. Yes, the white pith that you would consider garbage.
However, remove the stem base.
Clean the bell pepper. Cut the bell pepper and the chili in small pieces.
Preferably, remove the seeds from the chili, however, this is not compulsory. - Mixing
Put the lemon zest, the juice, and the minced pith together with the minced bell pepper and chili, and salt in a medium-sized pot.
Add sugar and stir. - Boiling
Bring the mix to a boil.
Then, reduce heat and let simmer for about 15 minutes. The solid ingredients should be pretty soft and a bit mushy. - Blending
Quickly blend with an immersion blender. Not for too long, there should be small chunks left.
Keep simmering for another 10 to 15 minutes. - Storing
Fill the marmalade right away in sterilized jars.
Leave at least one centimeter to the brim.
Make sure that no marmalade gets on the brim.
If you spilled some on the jar, wipe it clean with a paper towel!
Close the lid tightly and turn the jar upside down for at least ten minutes.
This way, you create a vacuum.
You can store the unopened jar for about a year. Once opened, you should keep it refrigerated and finish it within a couple of weeks.
Believe me, that will be an easy task!
Moroccan Preserved Lemons
Lemons, preserved in saltwater, are an important ingredient in many traditional Moroccan dishes. Whether in hot dishes like tagine or cold in fresh salads, they add a very specific, zingy flavor to your cooking.
Traditionally, they are made from two simple ingredients—lemon and coarse salt.
That’s not enough for me, so I’m adding some spices to the brine.
This Is What You Need…
- 4 organic lemons with unsprayed, edible zest
- five tablespoons of coarse salt
- three bay leafs
- five berries of allspice – crushed
- ten peppercorns
- one to two teaspoons mustard seed – crushed
if you like, you can also add a stick of cinnamon, four cloves – or whatever dry spices you like
…And This Is How You Do It
- Preparing
Rinse the lemons under hot water and dry them with a clean kitchen towel.
Put one tablespoon of the coarse salt in a large jar that, obviously, fits the four lemons. - Cutting
Slit the lemons evenly lengthways – deep, but without cutting them in quarters. The stem bases should remain intact.
Widen the slits with your fingers and stuff them with the remaining salt. If you have sensitive fingertips, use gloves. Mind you, your fingers are covered in lemon juice and salt – ouchie! - Potting
Place the lemons in the jar and cover them with boiling water. They should be completely covered, however, leave about one centimeter to the brim.
Close the jar tightly and turn it immediately upside down for about ten minutes. This way, you create a vacuum.
I always leave them for about six weeks before opening the jar. If you urgently need them, you can open the jar already after one month.
If you have never tried Moroccan Preserved Lemons before, be aware that they are neither as sour nor as salty as you might expect them. As a matter of fact, the whole process makes them rather sweetish and gives them a very unique flavor.
Of course, a couple of recipes cannot replace a trip to the wonderful coasts in southern Europe. Nevertheless, I hope, you’ll like my recipes and enjoy preparing your own Mediterranean condiments.
Hence, let me know in the comment section below how it went!
Pinnable Pictures
If you choose to pin this post for later, please use one of these pictures:


Did You Enjoy This Post? Then You Might Like Also These:
Day Trip to CAMOGLI – The Most Colorful Beach Town East Of Genoa

An Audience With GENOA – What Not to Miss When Visiting the Queen of Liguria

How to Visit the Biennale di Arte in Venice in 2026

Comprehensive Guide to COMO – a Lake to Like

Best Things to Do on a Long Weekend in Milan

The Best Places to Visit in SICILY in One Week